It's almost to the end of this project.. the rod wraps just need a few coat of varnish and that's it. Another great learning process in bamboo fly rod making.
I guess I will be planning for my 4th one soon....................................
I have been trying to make bamboo rods from bamboo of different area and of different species. It is difficult to differentiate the exact species of bamboo, I must say.
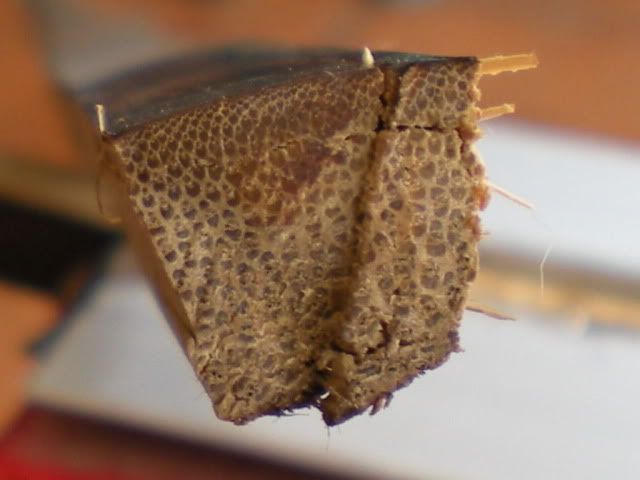
The only method to check whether the bamboo is suitable to make rod is to examine the cross section of the bamboo before I start the process.
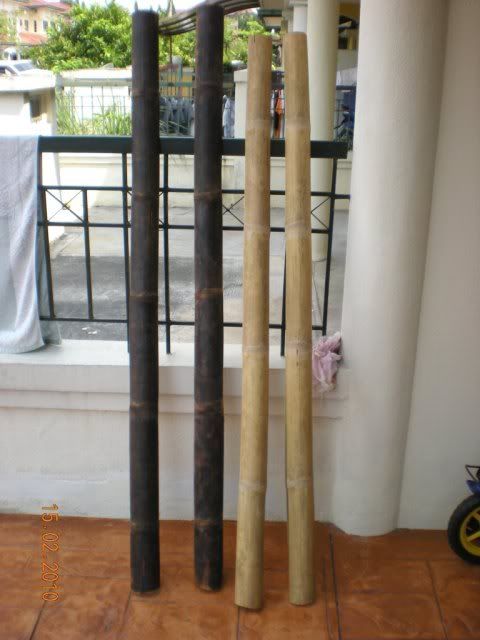
I harvested a few culms of local bamboo from Sungai Bernam a couple of months back. The fiber looks dense and very promising. But the color is brownish when it's dried, even when not flamed.
So, the project started. This bamboo is more manageable than the previous bamboo harvested from Sungai Batangsi in Semenyih. It is straighter and have lesser nodes.
The bamboo was flamed and hand split to about 20 strips.
The next step will be straightening. This time, it will be much easier.................
I was introduced to fiberglass fly rods which is the closest thing to bamboo fly rod by some friends. Modern fiberglass fly rods are light and relatively easy to handle for those who love slow action rods.
I dug into the world wide web and I found a very interesting forum where all of the forumers uses fiberglass fly rods. http://fiberglassflyrodders.yuku.com/
There are so much information on fiberglass fly rods that I got from this forum and the forumers taught me a lot of things especially in rod building. Looking at those glass rods built by pro builders such as Mark (Gypsy), Mike Mcfarland, Don ( Zenkoanhead) ... just to name a few, pushed me a step further in rod building. Their meticulous work never failed to amaze me.
That was the beginning of my second phase in rod building. I started off with affordable fiberglass blanks that I could find.... LAMIGLAS. Nice glass rod for that price range.
I bought a couple of Lamiglas blank, a few Mcfarland blanks and ordered some components from Anglers' Workshop and Mudhole. There is no looking back since ...
The first Lami I built, a 7' 2 pc 3wt
The 2nd Lamiglass, a 7'6" 2 pc 4wt
McFarland Spruce Creek 7'6" 3 pc 5wt
Mcfarland 6'5" 2 pc 3wt
The last of my Lami blank, another 7' 2pc 3wt with rattan grip
Diamond glass 7' 3pc 3 wt
The best part about rod building is the satisfaction of being able to complete the built and customizing the fly rod. I am a hobbyist rod builder and I enjoyed every moment and the process of rod building.
What's next?
I have thought of rolling my own fiberglass blank but there are too much stuff involved and I am not able to source for the raw materials let alone the space for me to do so.
My next best option is making bamboo fly rod blanks. There are ample of natural resource here and bamboo is easily available.
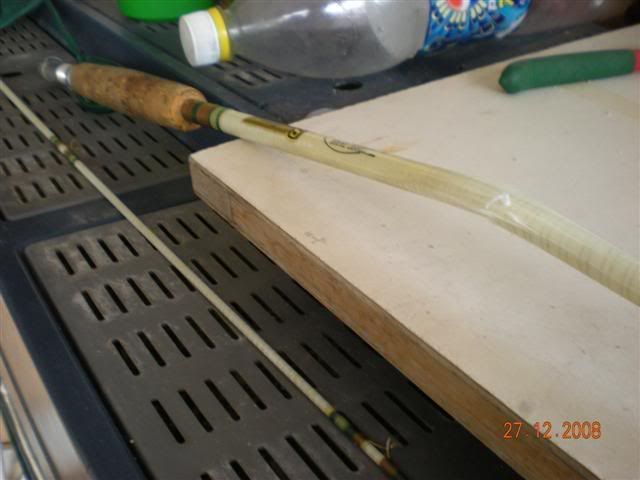
Remembering the 1st time I had a taste of rod building... or rather rod refurnishment was re-building a broken Shakespeare Wonderod. It was a 8 footer 2 piece glass rod which was broken during shipping from US.
It was broken at the butt section and throwing it away would be a waste. So, I decided to refurbish it. I have no idea what I will getting into... and I have no confidence if I will be able to refurbish or not. After all, if I don't refurbish it , I will be dumping it.... so , why not?
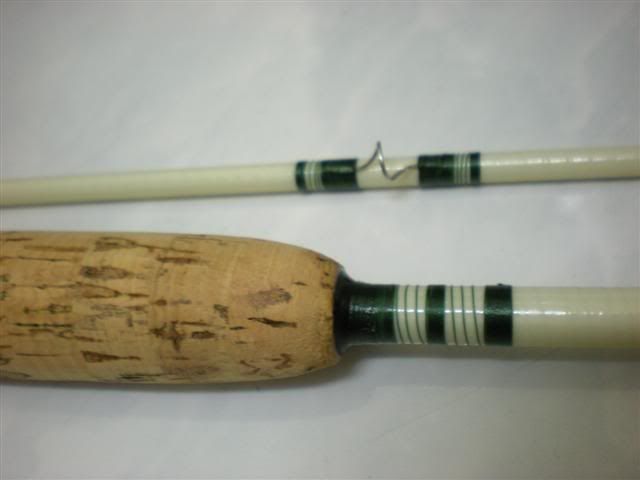
So, I stripped all the guides and managed to salvaged the cork grip.
Then, my journey of information seeking started. I did a lot of reading on rod building and rod refurbishment from internet. This should be fun, I thought.
I started assemble the original cork grip and reel seat using Devon 5 minutes epoxy.
Found the guide spacing from the internet. As I do not have any wrapping threads, I have to recycle the threads which was removed from the rod and finished off the wrapping with nail varnish.
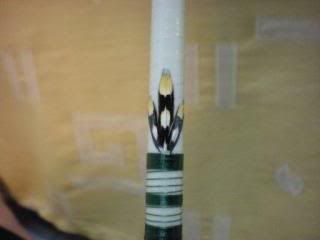
I even tried to do feather inlay at the butt section. It seems so enticing and I just could not resist doing it.
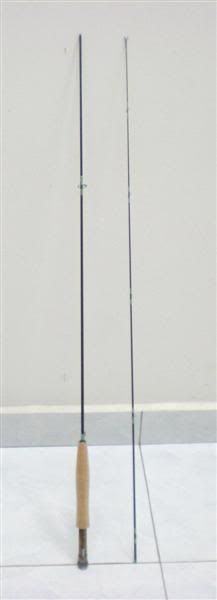
The refurbished 6' rod turns out to be good, so to say.
Later, I purchased a few more graphite blanks and started to build basic fly rods for practice.
A 6'6" 2wt fly rod..
A 3/4wt 8' 4 piece fly rod...
A.Parramoure 2/3wt 6' 4pc
As I got more confidence in handling the finishes of the rod, I tried to build fanciful fly rod with signature wrapping. But that is another story...............................


 Found the guide spacing from the internet. As I do not have any wrapping threads, I have to recycle the threads which was removed from the rod and finished off the wrapping with nail varnish.