I have always wonder why bamboo fly rods are so darn expensive.. I mean, there are just made of bamboo. It easily cost from RM 900 to a ridiculously RM 10,000 or more. The expensive ones are more of collector's item. Who would fish with a RM 10,000 rod? They must be out of their mind..
It wouldn't be that hard to make one, I guess. I took the challenge and tried to make one myself.
Not a big problem, I thought. My journey started 8 months ago that is when I started reading about the construction of bamboo fly rod from the internet and asked some bamboo makers from USA for tips and how to..
Even before I start, I am already having a problem. Raw material !!!! Most bamboo rods are made of
Tonkin bamboo. Where the hell am I supposed to find that in Malaysia????? Then I found out Yoshida, a bamboo rod maker in Japan uses local japanese bamboo
Madake-Phyllostachys bambusoides to make his rod and same goes for Calviello's rod from Argentina, he uses local Argentina bamboo. There are 50 over species of bamboo in Malaysia and I am sure I could find one that is suitable to make the rod.
My venture for bamboo started and I found one which I think can be made into fly rod. Thickness of culms about 10mm and quite dense in fibers. I search and read through the bamboo species indentification, that species could be a
Dendrocalamus.

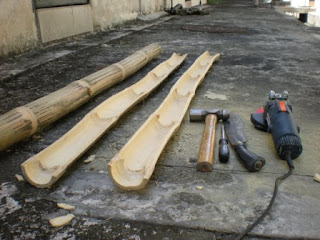
 Splitting the BOO
Finally I kicked off my 1st bamboo fly rod making project..
The bamboo are hand split and flamed from the inside. I tried to maximized the numbers of strips possible. I managed to salvage 19 strips out of 26 strips from the 2 bamboo culms. The rest was either too narrow or broken.
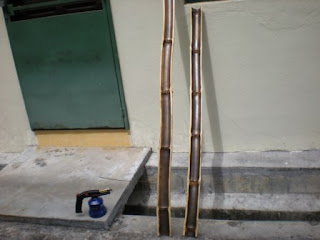
StraighteningThis was the complicated part. Since the bamboo I used were not as straight as
Tonkin and there was a lot of nodes on the strips, I had trouble straightening the strips. Additional work have to be done to straighten the strips. I have to heat and straighten the strips several times before I got them straight.... not 100% straight but still within a manageable tolerance.
I used a variable control heat gun, a vise and a press handle.
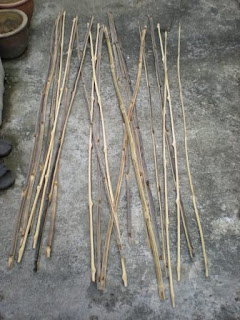
 Rough strips
Before the final taper planning, I have to form the strip to a 60* angle strips. I tried doing this with a rough planning form. But every time I planned the strips , it got odd angles. The strips just don't turn out well.
I have to construct a Medved beveler before I made more damages and lose my strips.
Medved BevelerI did not follow exactly as the plans but made a few changes, thinking that it would be alright.
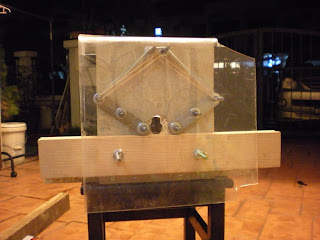
This is the 1st one I built. Noticed that "press arms" are facing each other. Bad idea !!!
It make the strips more difficult to pass through the feeder.
I have to change the "press arms" to a single direction so that I don't have to force the strip through the feeder.
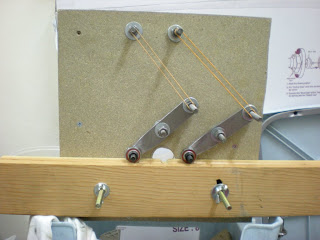
Medved Beveler rebuilt.
Changed of direction of the "press arms" and roller bearing added.
Back to rough strips..I was back on track. The rough strips turned out to be 60* angle at all side.

 Rough strips binding and heat treatment
I managed to do 4 sets of rough strips and bind them for heat treatment for further straightening.
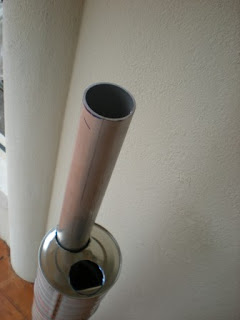
Heat treatment?? How??
Back to the computer to search for the easiest heat treatment oven that can be constructed.
Instead of using heat elements, I made used of the hot air gun I had and constructed a heat treatment oven that uses hot air gun.
I used these..

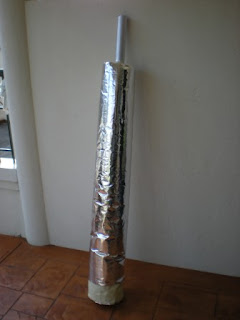
...and came out with this..

And wrapped it with a layer of rock wool and aluminum sisalation sheet.
After heat treating the rough strips, I was ready for final planing...
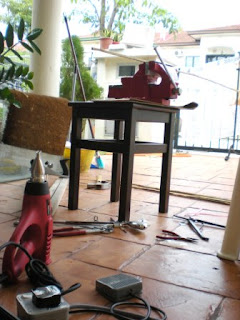
Planing form
As a newbie in bamboo rod making and sourcing for a steel planing form would be very costly.
I don't think it is available in Malaysia. Either I have to import it from the States or fabricate one myself. I tried to ask a friend to make a steel planing form for me but it seems that he don't quite understand how to get the taper correctly. The next best choice is to make one out of timber myself. Timber is the easiest available material that I can get my hands on.
With all the knowledge and information I have gathered from the internet, I went ahead and make one.

The timber planing form turned out to be okay.
Planing processSome say it is better to soak the strips before planing. But I prefer to plan the strip just as it is. Bit by bit, I started to plan the strips. That is because I was using those cheap planes. Made in China... but it was not all that bad.
My final taper turn out to be just fine.

Then I bind the strips together and see how it turn out...

That was the tip section.
Now for the easier section... the butt section.
 Gluing
I used Titebond III to glue all the strips together. Hand bind and the strips blank was hanged for drying.
After the glue is set, the thread and excessive glue was removed by scrapping with a thick blade or glass edge.

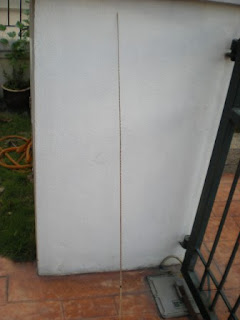
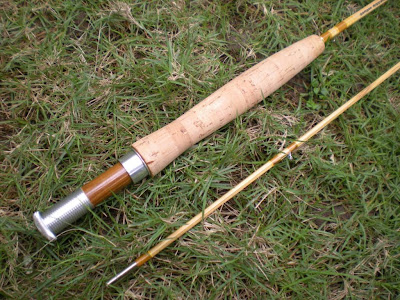
The bamboo rod blank is then measured and cut. The taper for this bamboo rod blank is Dickerson 7012, 7' 4wt.
 Ferrules
I used normal brass chrome plated ferrules for this rod. NS ferrule for fly rod is just too expensive.
 Hardware installation
I hand rubbed the bamboo rod blank with Poly Urethane two times before fixing up the hardwares.
Wrapped with Pearsall's Silk Golden color with NCP Yellow trims.
I used Pac Bay lite wire snake guides and Mildrum stripping guides.
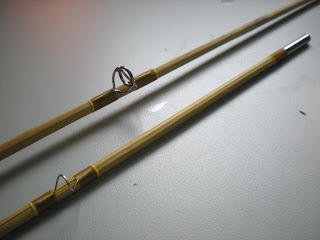
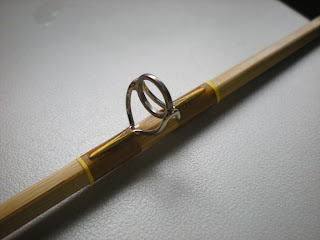

The wraps was finished with several layers of poly urethane. I did not want to use FC epoxy because I want to minimize the weight of this rod.
Final touch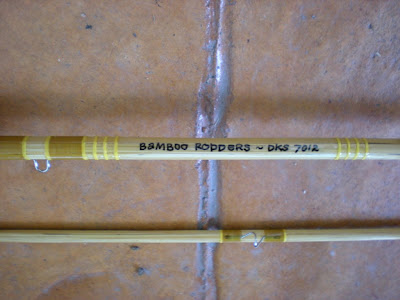
A final layer of hand-rub poly urethane finishes on the rod after the inscription was done.
 Testing and fishing
The bamboo rod was intended to be a 4wt rod, but it turn out to be slightly softer. It takes a 3wt line with no problem. Parabolic flex.


